How to combine photos, seamlessly blend and match the colors in Photoshop.
A very important skill to have in photoshop is the ability to combine photos and blend them together seamlessly while matching the color and tone. The doesn’t have to be difficult guys. Here is my Photoshop technique to make this so easy, it’s fun. Watch the video first and then use the written steps as a reference. If you like this, tell your friends about PhotoshopCAFE, they will love you for it 😉
Step 1.
Open the 2 images in Photoshop, they are in separate documents, we need to get them into a single window.
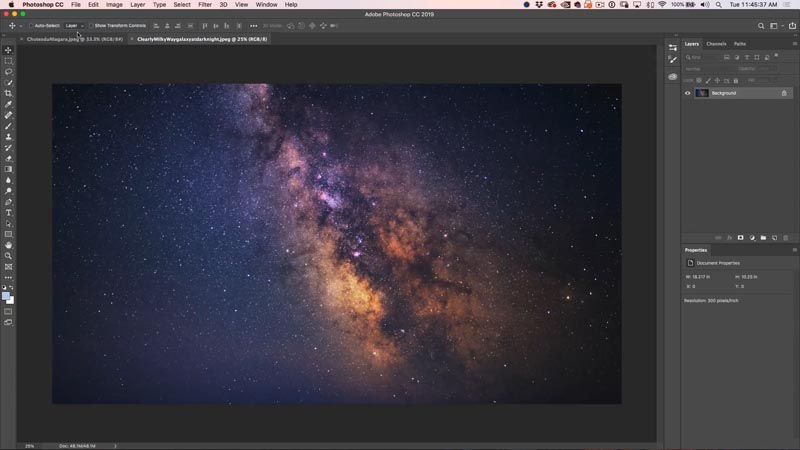
Step 2.
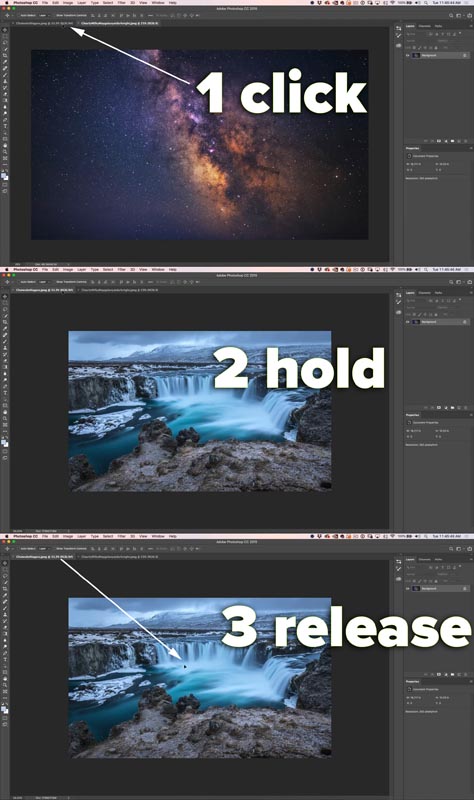
It’s as simple as a 3 step process, Click, hold and release. This has to be done just right though.
1. Choose the move tool (v). Click and drag up into the the tab of the document you are moving it to.
2. Don’t let go yet, wait a couple of seconds and the destination image will open, keep holding (I feel like Braveheart, hold, hold…)
3. Move your cursor to the middle of the image and release. (Hold Shift to drop it in place).
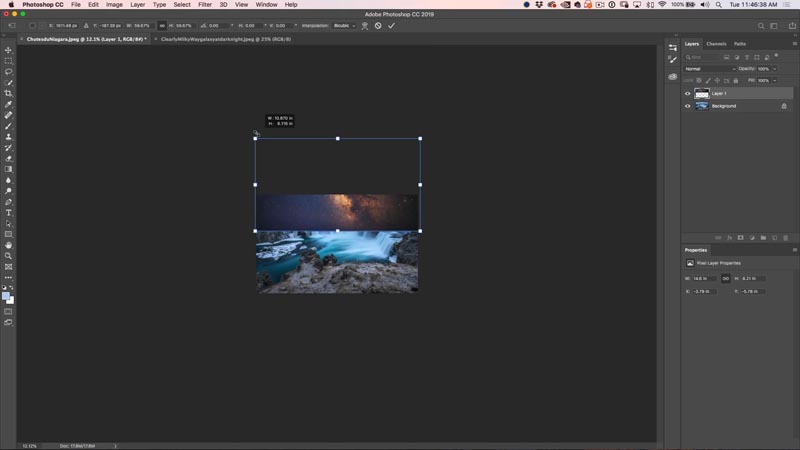
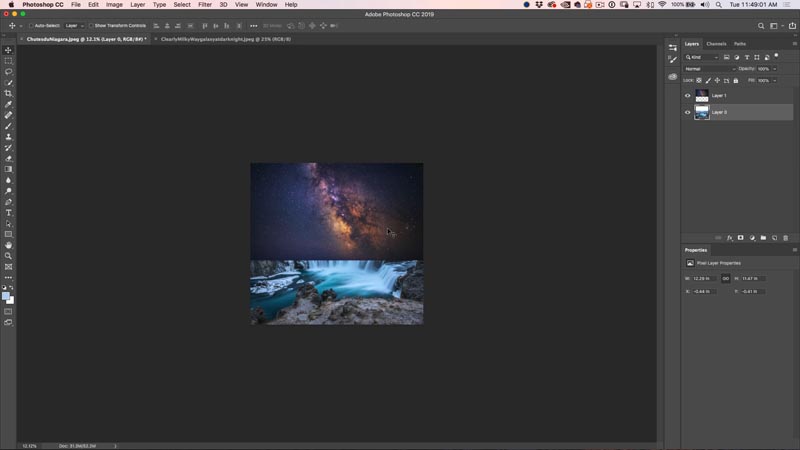
You will now see the images as 2 layers. Lets position them

Step 3.
Drag the top layer into position. If you press Cmd/Ctrl+T you will see the boundaries.
Press Enter when it positioned correctly
Step 4.
Let’s resize the canvas to show the whole composition.
Choose Image>Reveal all
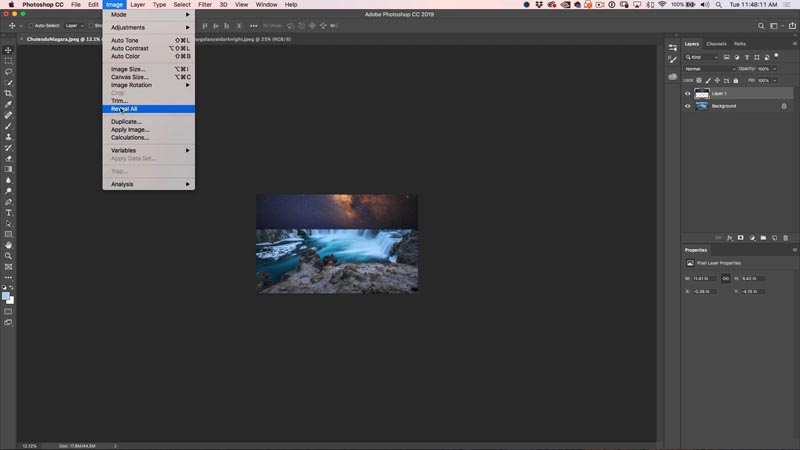
And, boom, now the canvas is now the correct size.
Step 5. Blending the images seamlessly
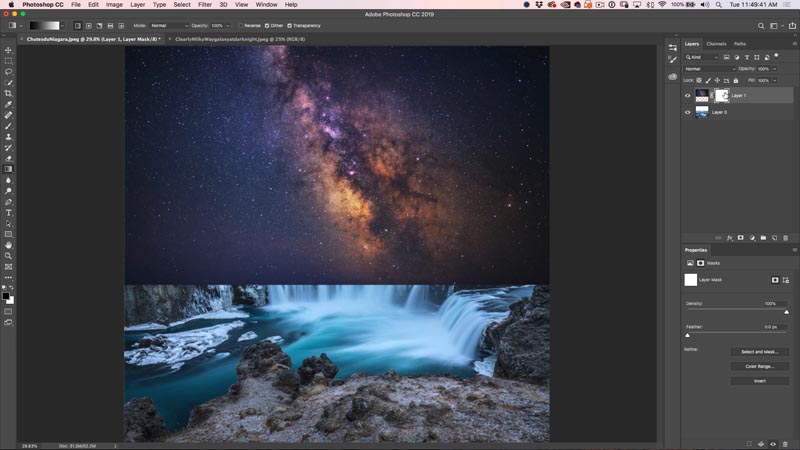
Choose the top layer and click on the new Layer mask icon

Step 6.
Choose the gradient tool (G), reset foreground and background colors (D).
Make sure the gradient is set to Linear, Foreground to background, normal blending mode and 100% opacity (default settings).
Step 7.
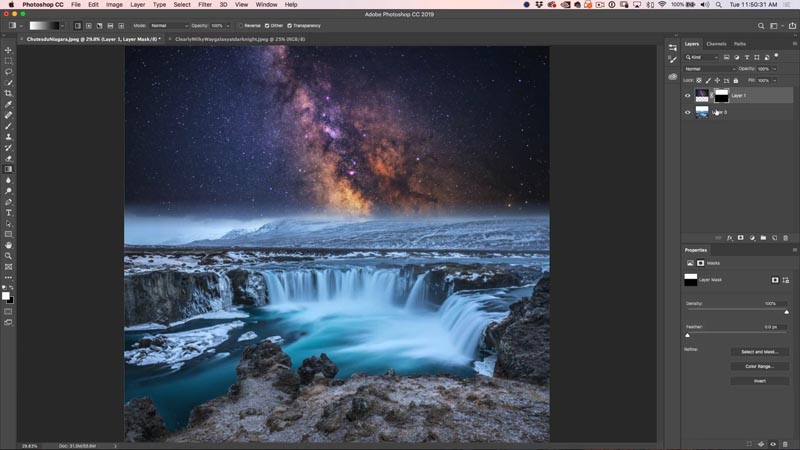
With the layer mask selected, drag the gradient in the area between the 2 images to get a seamless blend. Watch the video above to see this in action.
Step 8, matching colors across layers in photoshop
We have a nice blend, now we need to match the color and tone of the images.
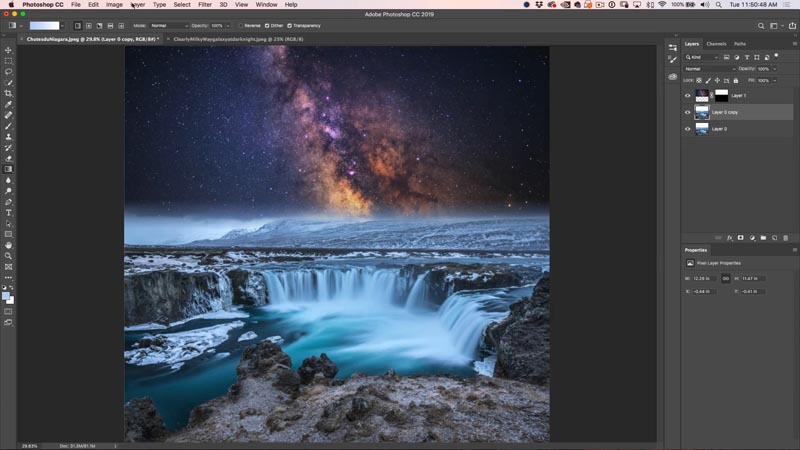
Duplicate the background layer (waterfall) Ctrl/Cmd+J
Step 9.
Choose Image>Adjustments>Match Color
Under Source, choose the same document that you are working on.
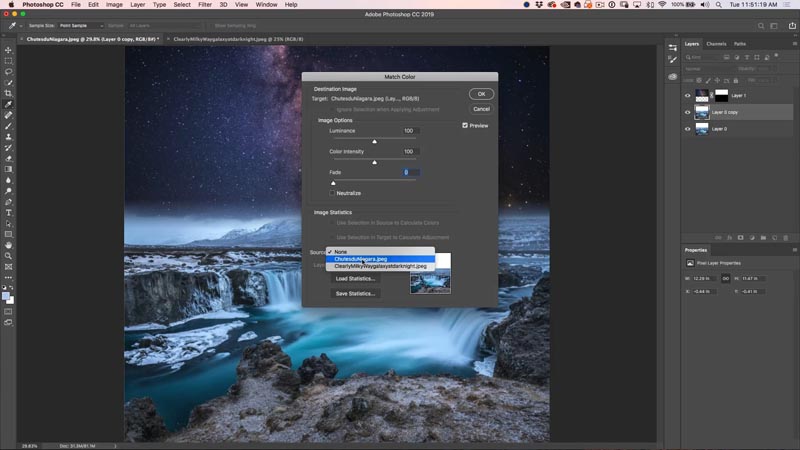
Under Layer, choose the layer that you want to get the color palette from. (Layer 1, milky way).
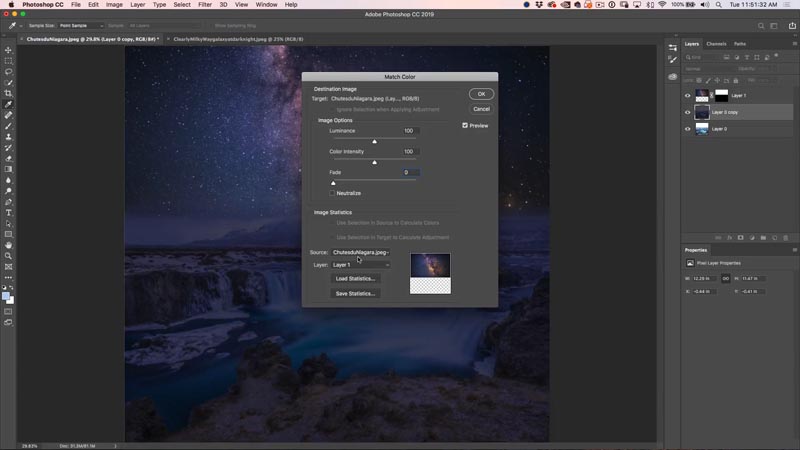
Step 10.
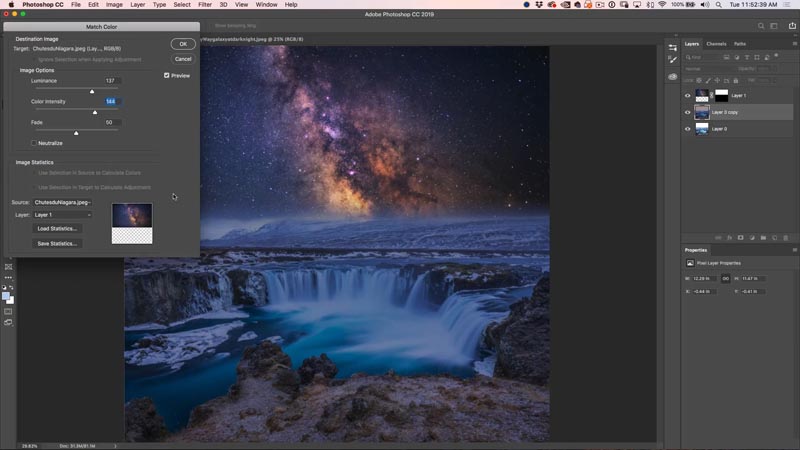
Adjust the 3 sliders until it matches (see video for more details).
- Luminance: Brightness
- Color Intensity:Saturation
- Fade: Amount of effect
Step 11: Cleaning the highlights.
The colors are matching, but the highlights are looking washed out, lets make them pop.
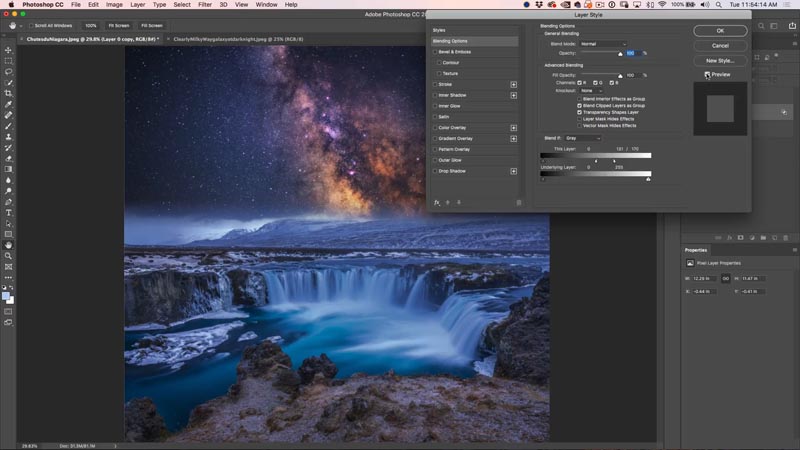
With the top layer of the background selected (the one we applied match color to). Click on the fx button on the Layers Panel.
Choose Blending Options at the very top of the pop up.
In Blend if, move the top white triangle to the right. You will see the whites come back in the waterfall. It looks posterized, let’s fix that.
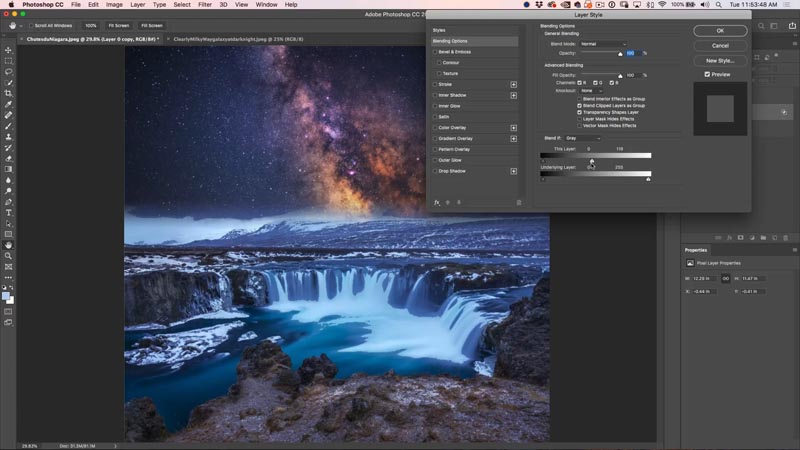
Hold down the alt/option key and drag on the right side of the white triangle. It will separate and allow for a nice even blend of the whites.
Make it look like the screen shot.
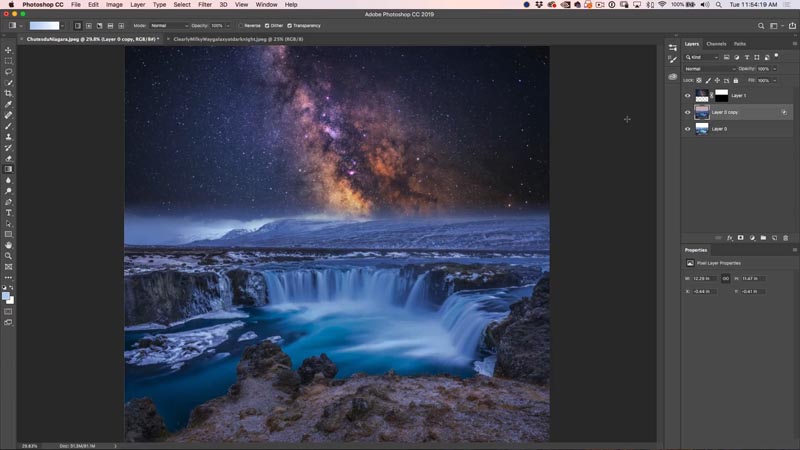
And we are all done! Congrats!
I really hope you enjoyed this week’s tutorial and that you learned some useful things about combining images. If you did, share this page with your friends!
Thanks,
Colin
PS Don’t forget to join our mailing list and follow me on Social Media>
(Ive been posting some fun Instagram and Facebook Stories lately)
You can get my free Layer Blending modes ebook here
The post How to combine and blend photos in Photoshop: night sky appeared first on PhotoshopCAFE.


