Dodge and Burn Tutorial, Paint with light and shadow to add 3 dimensional depth to your photographs. (and digital art)
Dodge and Burn is the art of selectively lightening, or darkening portions of a photograph. Changing the value of light is the main tool employed by artists for centuries to show form, surface quality, texture and depth.
Get your free PhotoshopCAFE Dodge and Burn kit here,
By changing the tonal values, a circle becomes a sphere, a rectangle becomes a cylinder and a triangle becomes a cone.

But Dodging and burning is much more than that, it can be used to guide the viewer’s eye and to simplify a busy composition by separating objects. I’m going to show you a super easy, yet powerful way of dodging and burning in Photoshop. Spoiler alert, we will not be using the dodge and burn tools.
In this tutorial, I’m going to show you one of my favorite methods of dodging and burning in Photoshop. This is going to create a 3 Dimensional form in your photographs and make then stand out from the crowd. I do want to quickly mention Dean Collins amazing training on 3D Contrast, it’s the seminal lighting training that will change the way you light your photographs and videos.
Dodging and burning come from the photographic darkroom where the exposure is controlled in certain areas while making a print. Ansel Adams elevated this technique.
- Dodging: Lightening areas of a photo. An object it used to block light and causes a lighter exposure (working from a negative)
- Burning: Darkening areas of a photo by allowing light to hit just a portion of the image, using a card with areas cut out (stencils ).
By using Photoshop, we have much more control than ever over Dodging and Burning. We are essentially digitally doing what Ansel Adams did in the dark room.
I have created a 2.5 hour training course on Dodge and Burn where we explore different techniques for adding shape and form, contrast, body sculpting, facial contouring and even working with multiple exposures for stunning landscapes. Check that out here
Let’s jump right in now and learn how to Dodge and Burn in Photoshop.
We will begin with this photograph (download here)
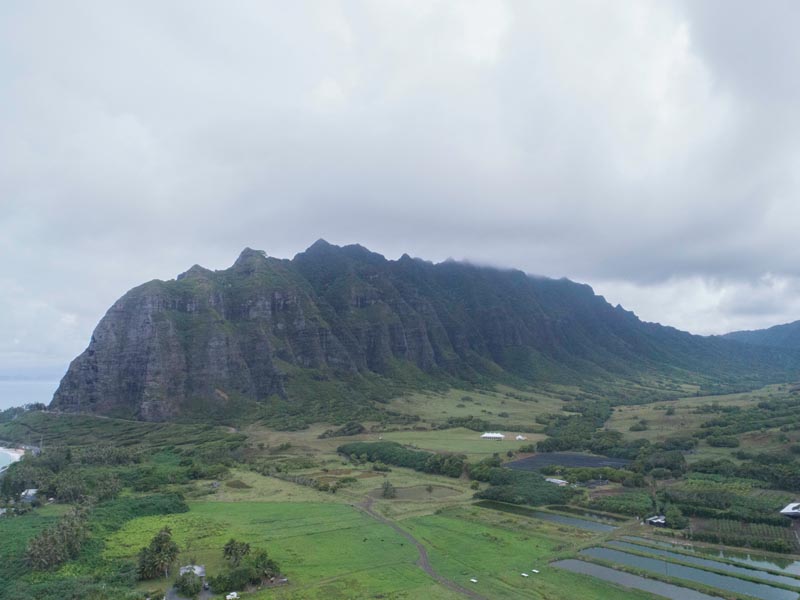
Step 1, set up your brush
First of all, let’s set up our brush. Press the D key to reset foreground and background colors to black and white. Press the B key for the brush tool.
![]()
Click on the Brush settings to open the brushes panel.

Choose a soft edged brush.
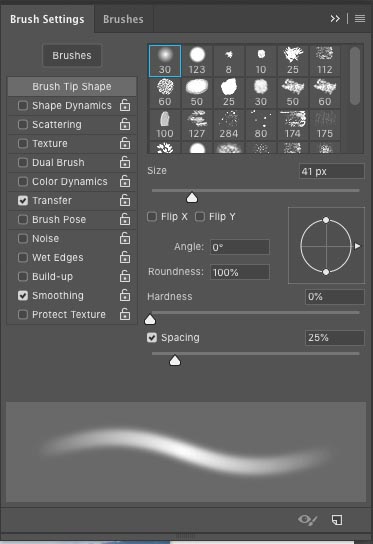
I’m using a Wacom tablet here because it supports pen pressure. If you don’t have a tablet, you can still use a mouse, just make sure you use a low amount of opacity and build it up. If you have a pressure sensitive pen, choose Transfer and turn it to pen pressure
Choose Shape Dynamics and turn it off. Choose 30% opacity (10% if using a mouse)

The bush is ready.
Step 2: Now let’s prepare the layers.
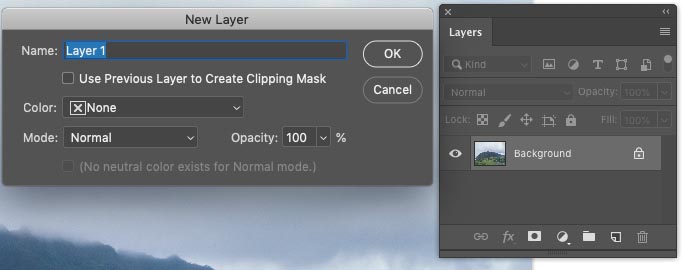
In the layers panel Hold down Alt/Option key and click on the Add new layer button.
This will open the options box
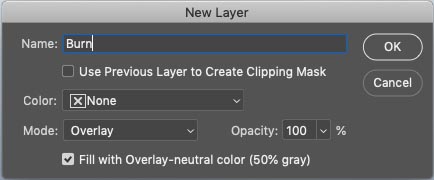
Change the blending mode to overlay and click “fill with neutral color” name it burn, or dark and click ok. (I always remember which is which because burnt toast is dark
With the Dark layer selected, Press Cmd/Ctrl+J to duplicate it and change the name of the duplicate to dodge or light
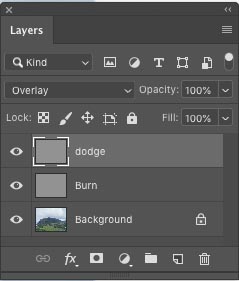
We are all set to begin now. These are the same setup steps you will use for every image.
In fact, if you click here to get a free Dodging and Burning kit, which will contain my dodging and burning action, the same photo I’m using here and a written PDF of this tutorial.
Get your free PhotoshopCAFE Dodge and Burn kit here,
If you used my action, start the tutorial here.
Step 3 Dodging and burning in Photoshop. (a) Set the overall mood
Select the burn layer and choose a black brush
Gently paint in the sky are to darken it down a little bit. (The video at the top shows where I’m painting).
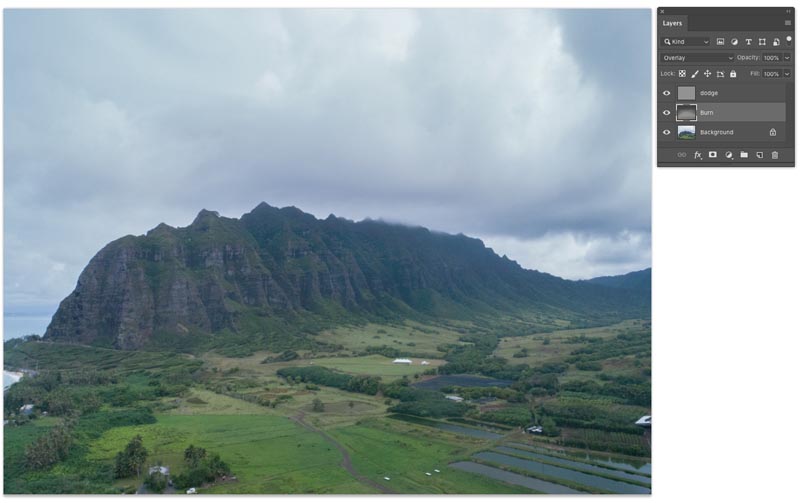
Press the X key to change the bush color to white. Choose the dodge layer and paint a strip through the valley to represent sunlight. Really easy so far. We have now set the overall mood and composition
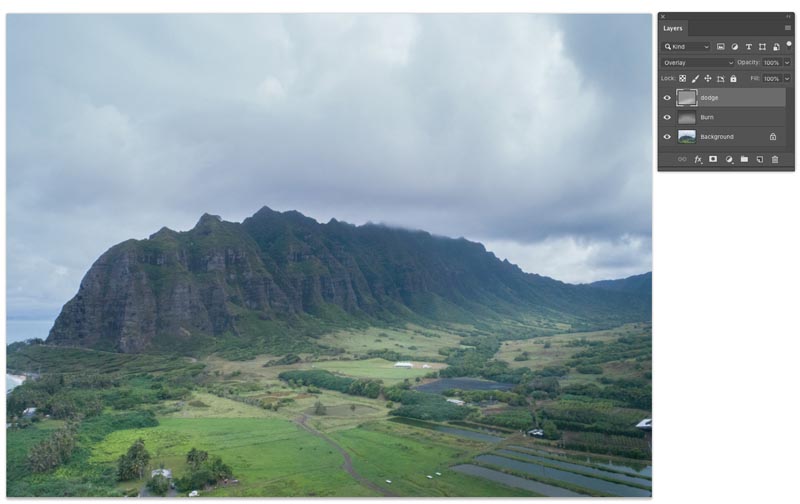
Step 4 Painting in the Depth
I like to stat with shadows. Choose the Burn layer and hit X for a black brush. (Drop the opacity at the top to 20%, keep 10% if using a mouse or trackpad).
Tap the Left Bracket key to make the brush smaller. Also zoom into the image.
Notice as you paint into the shadows in the mountain, it adds depth and separation. (I’m just doing this quickly, if you take more time and work finely, you will get even better results).

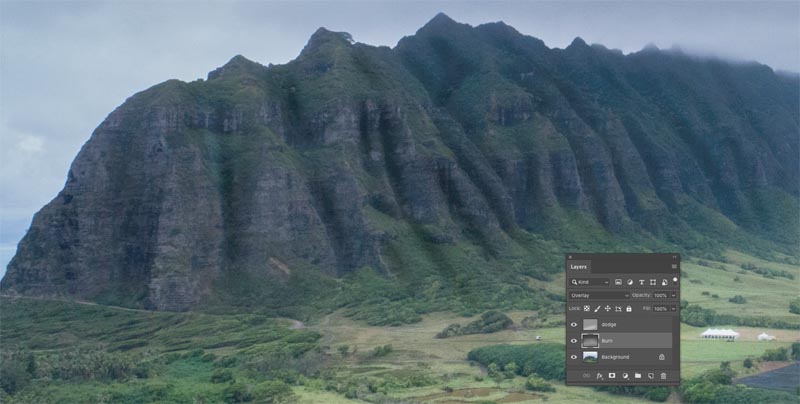
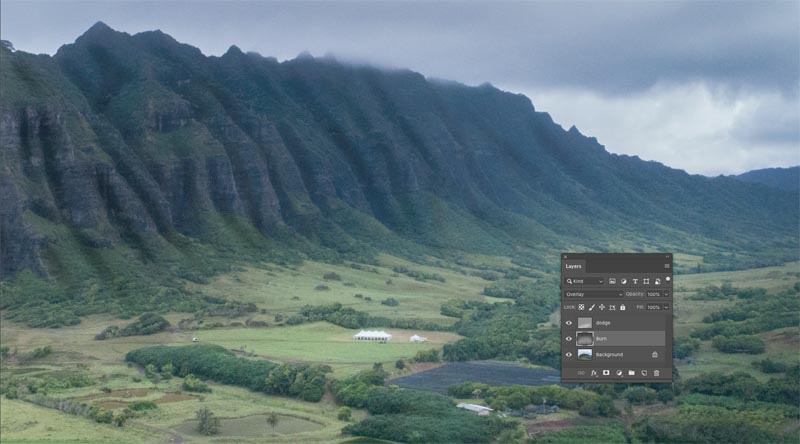
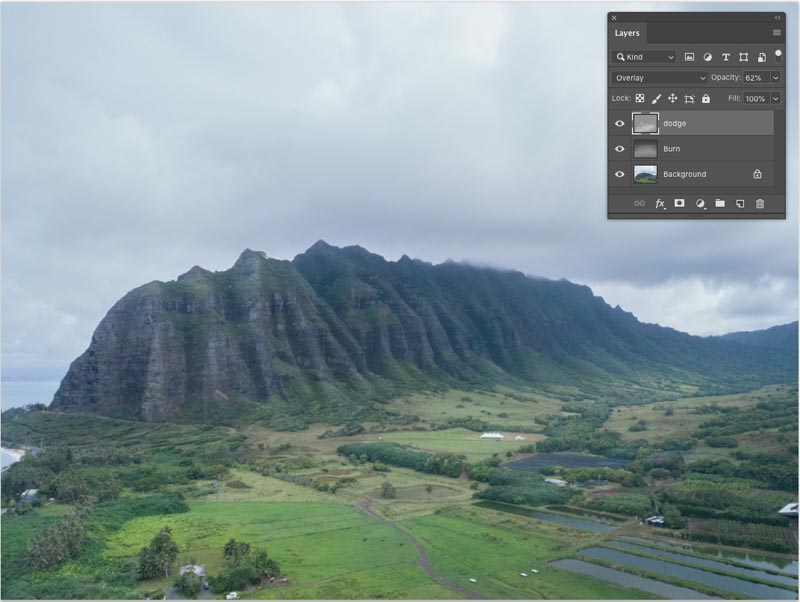
If it looks too strong, lower the opacity of the layer (48% here)
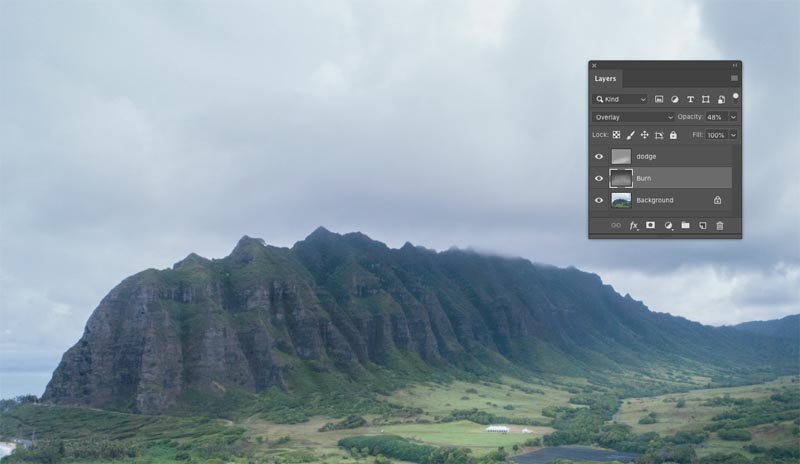
Switch to white and the Dodge layer, now begin to paint with light, Notice how it really comes alive. Also adjust the opacity of this layer when done.
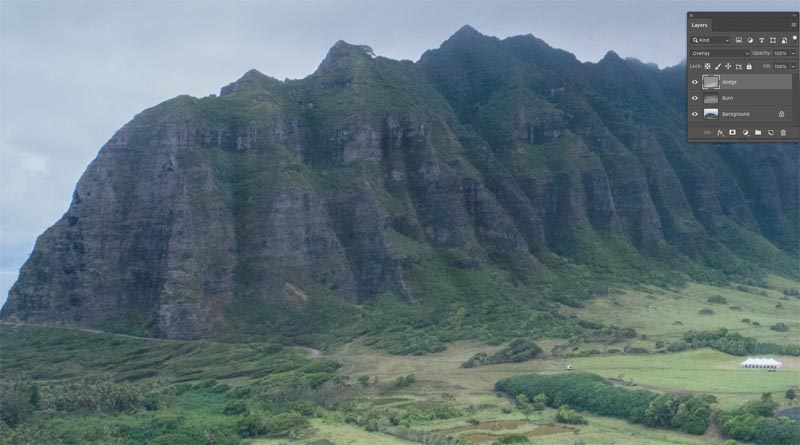
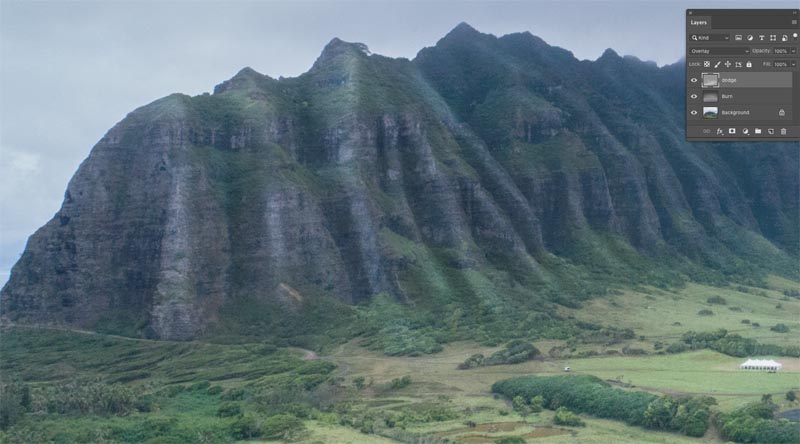
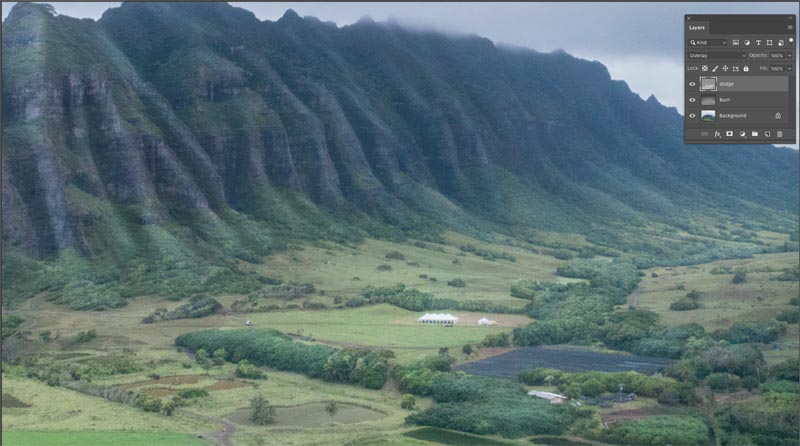
After
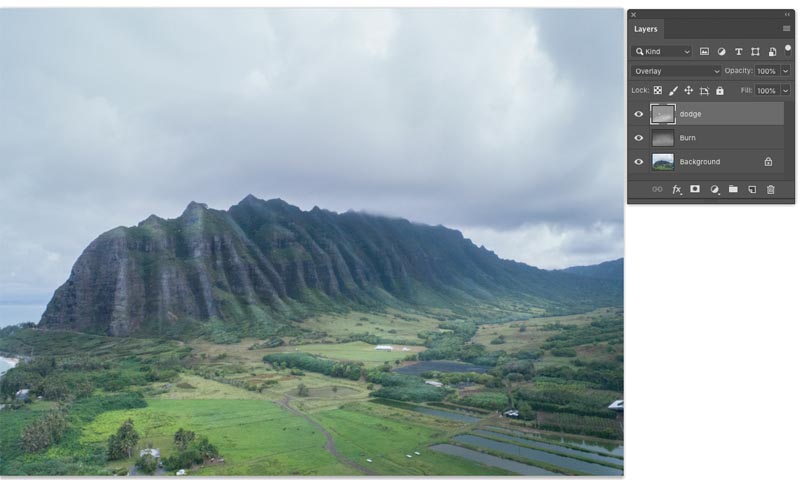
Before
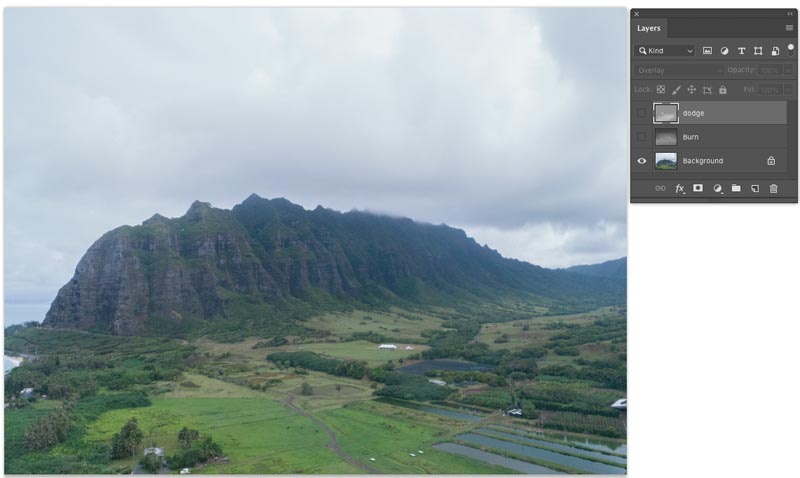
Lower the opacity to reduce the effect. The amount of opacity is up tp you, depending on the image and strong you want the effect. (I chose 62)
Let’s do a final color and tone corrections. I like to do this as the end because it blends in the dodge and burn work.
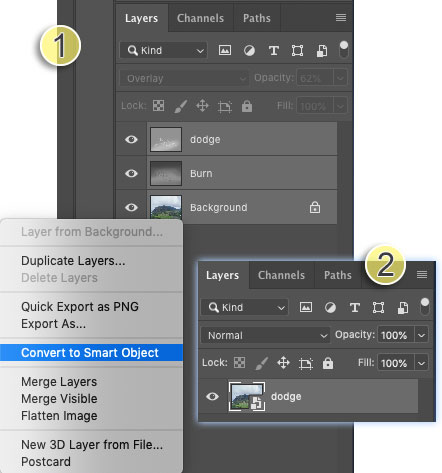
Select all the layers.
Right click and choose Convert to Smart object. This enables us to work non-destructively.
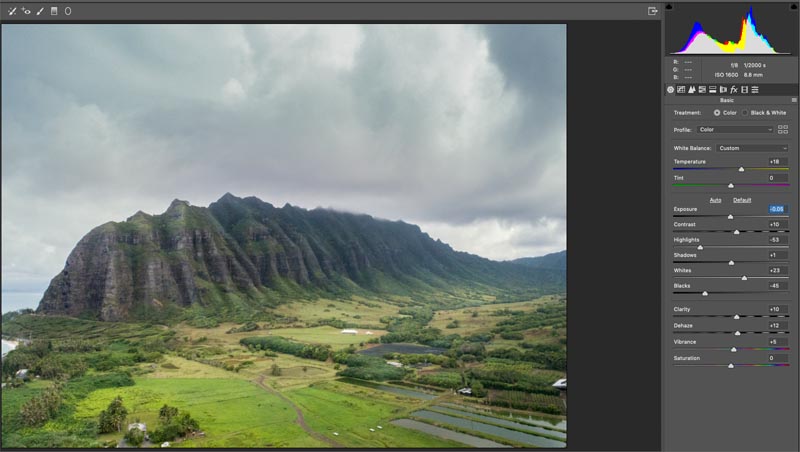
Choose Filter> Camera Raw filter and make adjustments as shown.
Click ok and you are done!
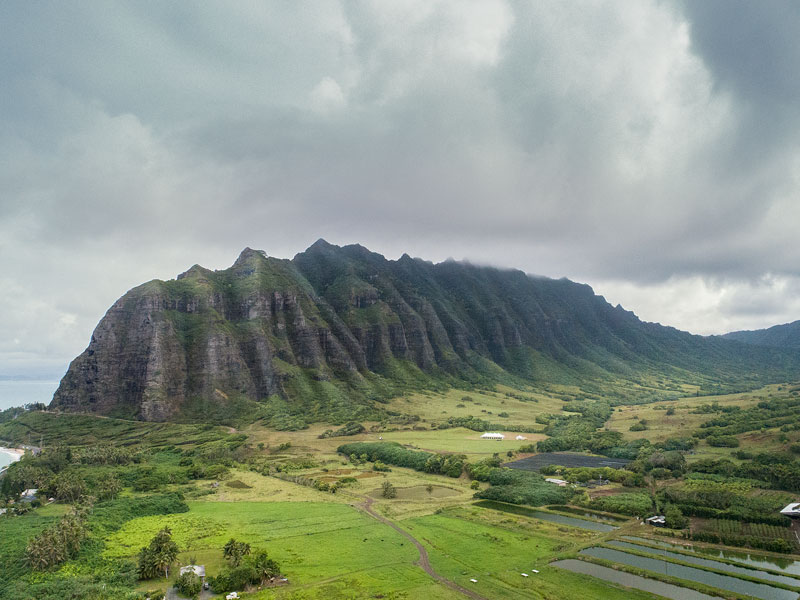
I hope you found this tutorial useful. Drop a comment and let me know.
You can get my free Dodge and Burn kit, with includes this tutorial as a Downloadable PDF Tutorial, Dodge and Burn action and the same image I’m working on.Get your free PhotoshopCAFE Dodge and Burn kit here,
Click here to get it.
If you are already on the list, it’s in this weeks email. (See all the cool stuff CAFE crew get).
Thanks for checking this out and great to see you here at the CAFE
Colin
The post Add 3D Depth to you photos with Dodge and Burn in Photoshop. Paint Shadow and Light appeared first on PhotoshopCAFE.


